Showing posts with label tips and tricks. Show all posts

Friday, November 28, 2014

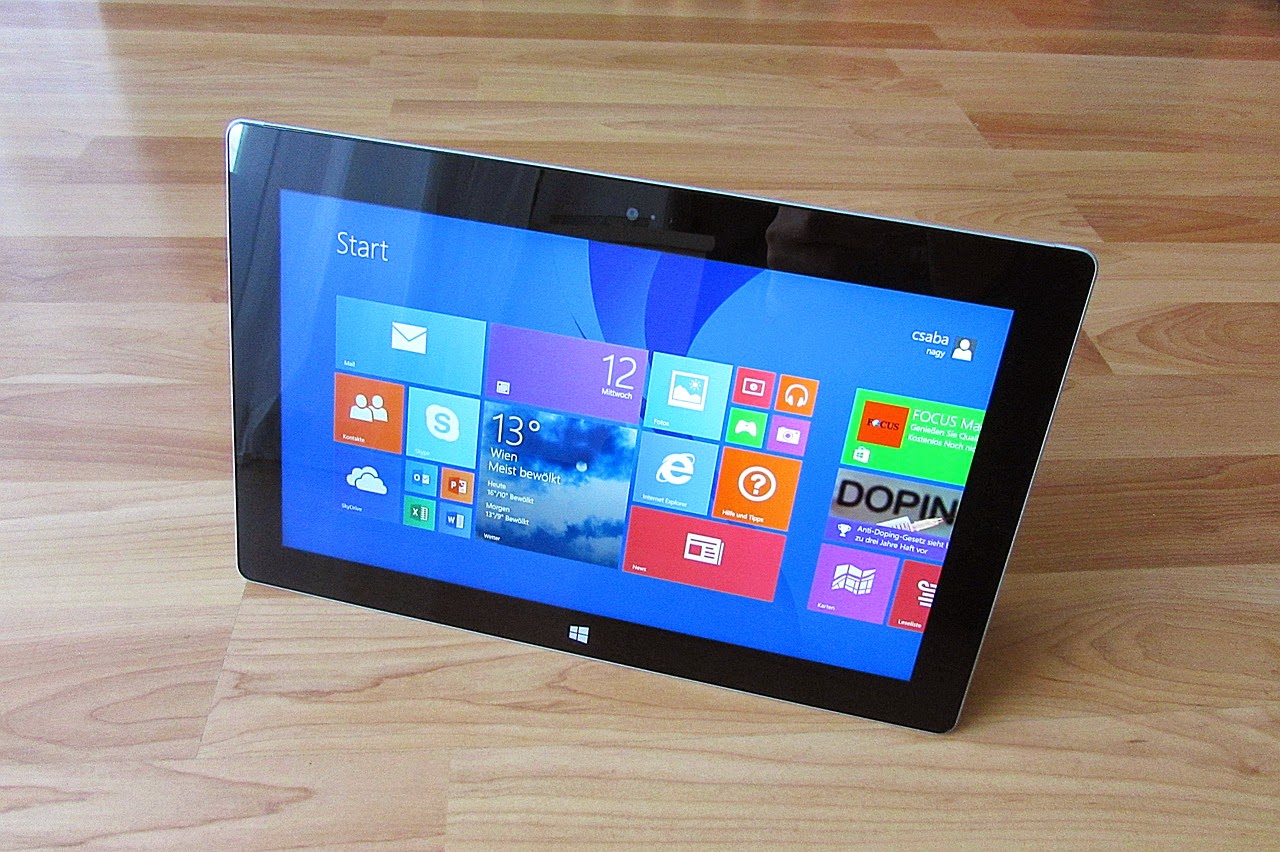
5 Tips and Tricks to Get More Out of Windows 8

Are you someone who've just started running Windows 8 on a shiny new PC and have been beating around the bushes trying to figure out how to use it to the fullest? Or are you someone who just updated their laptop or desktop? If so, you probably have worked your way through the basic tutorials of Windows, as well the basics of Windows 8.

Managing and customizing Windows is a different story with Windows 8. There are plenty of new commands and features in Windows 8 are hidden or quite hard to find, so it won't take too long before you figure out where and how to perform a specific task. Tablet users can swipe their way around the Start screen and Windows 8 apps with their touch-sensitive displays, but PC users are up for a challenge with the new Windows version. However, here are some power-user tips that are guaranteed to make it a smooth ride for you with your Windows 8 desktop or laptop.

Customize Your Start Screen

Even though you can use your own personal background image to Windows 8's Start screen, you can still liven it up with a splash of different colors and styles. If you'd like to customize your Start screen, simply open the Charms bar, and then click on the Settings charm, and then click on the Change PC settings link.  On the PC Settings screen, click on the Personalize tab. On the right pane of the Personalize section, click on the link for Start screen. From these, you can choose a style from one of the two rows of icons under the Start Screen's preview window, and then choose your desired color from the palette below.

If you would like to have a sneak peek of the color combinations you've chosen, press the Windows key on your keyboard to get a preview of the new Start screen before saving it. Press the Windows key again to go back to the Personalize tab if ever you changed your made about the colors or style.

Locate an App, a Setting, or a File

You can perform this action right from the Start screen, just by typing the name of the application, setting, or file in order to locate it. For example, if you type the word "Windows" on the Start screen, you'll see all programs, apps, or files that have Windows on it from the search result such as Windows Defender, Windows Media Player, Windows Firewall, etc.

From there, you can even filter the search results by clicking the Settings option on the right panel, and you'll see specific settings related to Windows. If you click the Files option, you will receive a filtered search of all files or documents that contain the word "Windows" in their name or description. Once you have found what file or app you're looking for, simply click on it from the search results to access or open it from there.

Connect to a Wi-Fi Network

Compared to previous Windows versions, connecting to a wireless network is considered to be much easier in Windows 8 -- as long as you know where to find the option to do it.

To connect to a Wi-Fi network, open the Charms bar, then click on the Settings icon. This is where you will see the icon for the wireless network availability. If you haven't connected to a Wi-Fi network yet and there's one or more networks available, the icon will display the word "Available" and that's where you need to go to. On the next screen, you'll see a list of nearby wireless networks. Click the network you wish to connect to, select the option to remember the connection, in case you would want your computer to automatically re-connect to it the next time you're back on the same location.

After that, you may be prompted to enter the network security key, if the network requires one. Tell Windows if you want to turn on sharing between your PC and other devices on the network. If you right-click on a particular network, you will find additional information and options to help you manage that network.

Sync Settings Across Several Windows 8 Computers

By having a Microsoft account, you have the ability to synchronize a variety of settings across multiple Windows 8 PCs such as your account picture, Lock screen background, browser favorites, and passwords. By enabling this option, you also get to pick and choose which settings you would like to sync.

To do this, open the Charms bar, then go to Settings, and then click on the Change PC settings link. On the next screen, go to the Sync your settings section. On the top of the right pane, you will find the option where you can toggle the sync option to either On or Off. If you enable it, you will have the option to choose different categories of settings that you wish to include in the synchronization process.

Sunday, June 8, 2014

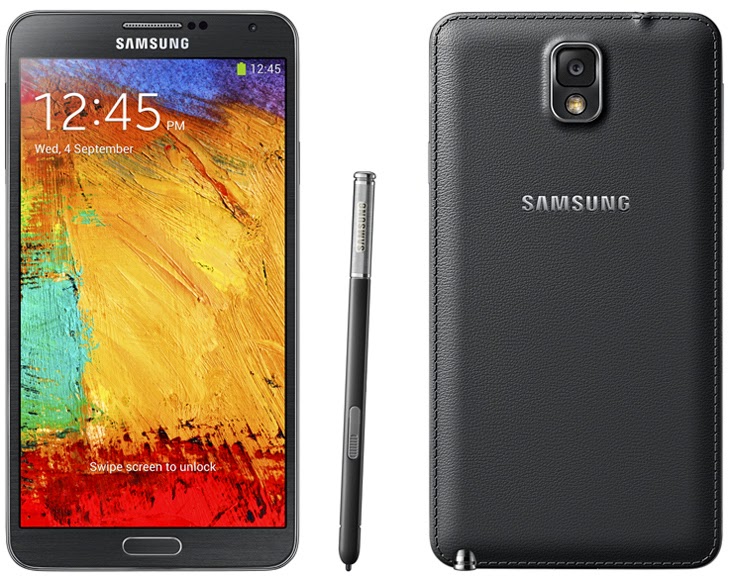
10 Handy Samsung Galaxy Note 3 Tips and Tricks

Fast, heavy packed, and powerful -- these are the words that would best describe the Samsung Galaxy Note 3. One may still get confused about its true identity -- Is it a phone? A tablet? Actually, it's something in the middle, integrated with the functionalities and features of both worlds. These ten handy tips and tricks will help you uncover the hidden features and bring out the best of your Galaxy Note 3.

1. Use Touchscreen Even With Gloves On
Capacitive touchscreens are great to use for responsiveness because they don't rely on pressure for interaction. However, the downside of capacitive touchscreens is that you can't use it when you're wearing gloves. Now, you can still use your Galaxy Note 3 even in the freezing cold by enhancing your phablet's sensitivity level to overcome this problem. Go to Settings, then tap Controls, then scroll to the bottom of the screen, and then tap to check the option Increase touch sensitivity.

2. Run Multiple Apps at the Same Time
The Galaxy Note 3 is perfect for multitasking because of its large screen. Its Multi Window feature allows you to use applications such as Browser, S Note, Gallery, Email, etc. at the same time, two apps which take up half of the screen each, with the size of each window adjustable. Go to your phablet's Settings, then Device, and then tap the toggle switch to enable the Multi window option. Tapping on the option will go to another screen where you have the option to open the content directly in the multi window automatically when files or videos are opened while the multi window is running.

3. Never Lose Your S Pen
Because it's quite easy to misplace the stylus when it's not docked, Samsung Galaxy Note 3 has a smart feature that will alert you whenever your S Pen is not placed back into the phablet's stylus hole. To enable the S Pen Keeper feature, go to Settings, Controls, and then S Pen. Tap the S Pen Keeper box to check it. So the next time you walk away without the S Pen in its proper place, your phone will give an audio alert reminding you what you have forgotten to do.

4. Turn Off the S Pen Pop-Up Window
A pop-up window automatically comes up along with different options whenever you remove the Galaxy Note 3's stylus from its dock. This can be handy, but can also be annoying to some extent. Imagine how irritating this pop-up message will be when you dock and un-dock your S Pen more than once. To make this pop-up notification go away, go to Settings, then Controls, and then go to S Pen. Select Pen detachment options, and then tap the option none. The next time you remove your stylus from its dock, there's no more pop-up message that will ruin your day.

5. Fully Close Apps to Save Memory
Most apps that are installed on your Galaxy Note 3 consume a significant amount of memory, more so when they are open and running in the background. To fully close apps, go to Settings, go to Apps Manager, tap to select the app that you want to close, and then tap Force Close.
However, bear in mind that some apps may re-activate automatically whenever you restart your phablet.

6. Mute Everything With Your Palm
You can mute everything or pause media playback on your Galaxy Note 3 by covering the screen with your hand while the screen is turned on. To control this option, go to Settings, Controls, then tap Palm Motion.
With this feature handy on the Galaxy Note 3, you'll never get embarrassed whenever your phone rings in the middle of a meeting or a quiet environment, where you don't want to catch any attention.

7. Use It Totally Hands-Free
It's illegal to use your phone while driving -- we all know that. And since the Galaxy Note 3 is humongous in size, it's more of a bad idea to use it while you're in a car. Thanks to the phone's hands-free options, you can still safely use it even when you're driving. You can simply wave your hand over the screen if you want to accept a call and have your text and caller information read aloud so you would know who is trying to get in touch without having to glance on your phone's screen.
To enable the Galaxy Note 3's hands-free option, go to Settings, then Controls, and then tap to select Hands-free.

8. Customize the Text Size and Font
Along with a huge screen, the Galaxy Note 3 also includes customizable font size and text to make it as personal as you'd like it to be. If you feel like you need to have larger text or a funkier font, just go to Settings, then Device, and then go to Font. From here, you can select any of the available font style and size. You can even get the one you really like from the Web by downloading it, which is also possible.

9. Enable One-Handed Operation
With the phone's largish 5.7-inch screen, it would seem impossible to operate it one-handedly. The one-handed operation feature is useful especially to users who have a fast-paced lifestyle and are always on the go. To turn on the Galaxy Note 3's one-handed operation, go to Settings, then Controls, and then One-handed operation menu. You can change the elements of the phone's user interface to make them more comfortable and easier to use with a single hand.

10. Never Miss an Important Call With the Super Ringer
There are times when your phone is in your pocket or bag, you'd barely hear it ringing or feel its vibration when there's an incoming call. You can now avoid this with the Galaxy Note 3 because there is an option where you can make your phablet ring louder. If you don't want to miss an important call, go to Settings, then Device, then tap Call, and then tap to check the Increase volume in pocket box.

Enjoy your phablet's full potential by learning about these common tips and tricks. As simple as it may be, these useful features will make your life easier and you'll definitely love your Samsung Galaxy Note 3 more.

Saturday, May 17, 2014

5 Tips to Improve Your Computer’s Performance

Computers, like any gadget or appliance, experience wear and tear. You might have been over the moon with its performance and specifications when you first had it. But over time, due to the programs and software you have installed, and all the files you have stored, it won't be how it used to be performance wise. However, there's no need to run off to the nearest computer shop to get a new one. Here are a few simple things you can do to improve your older computer's performance.

Disable Unnecessary Startup Programs
Over the course of time, you have probably installed a number or programs and applications. Most programs are designed to start automatically when Windows starts. These programs are often set by their software manufacturers to run in the background where you can't see them, so that they can open right away when you click on their icons. This can be very helpful for those programs you use on a regular basis. But it can also waste precious memory and slows down the time it takes for Windows to finish starting up, especially for those programs you rarely or never use.

To disable unnecessary startup programs in Windows 8, all you have to do is go to the Task Manager by doing any of the following:
  • Press [Ctrl] + [Shift] + [Esc]
  • Right-click the taskbar on the Desktop and select Task Manager
  • Type "task manager" on the Start screen, and then click Task Manager
  • Press [Ctrl] + [Alt] + [Del], and then click Task Manager from the screen that appears
  • Right-click the lower-left corner of your screen and select Task Manager
Once Task Manager is opened, click the Startup tab. From there, you will see a list of programs and services that launch when you start Windows. Go through each program and right-click the ones you want to disable from startup, and then click Disable.

NOTE: If you are running Windows 7 or Vista, click Start, then type "msconfig" in the search field, and then click msconfig.exe to open the System Configuration tool. Click the Startup tab, and then uncheck the box next to the program you would like to prevent from starting when Windows starts. Click OK to save the changes. Restart the computer for the changes to apply.

Install Additional RAM
Adding more memory is one of the easiest and without a doubt the best thing you can do to speed up and improve the performance of your computer. The more RAM you have, the faster your Windows and programs will run. You may refer to your computer's manual for specific instructions on how to physically add more RAM.

If you are not too keen in opening your computer case and plugging memory modules into its motherboard, you can use Windows Readyboost as another option to boost the amount of memory. This feature allows you to use the storage space on some removable media devices, such as USB flash drives, to speed up your computer.

Delete Programs You Never Use
It is a good idea to uninstall all programs you do not need or never use, whether they are manufacturer-installed software or software you installed yourself. You can also delete unused files and duplicate photos while you're at it.

Another thing you can do is use a cleanup tool such as CCleaner. CCleaner helps in clearing out cache and temp files to further free up some valuable disk space. Furthermore, you can use Disk Cleanup, which is a Windows built-in tool to get rid of unused files. You can check out this guide to learn how to delete system files using disk clean up in Windows 8 or find out how to clean up all files using Disk Clean up on a Windows 7 computer.

Defragment Your Hard Disk
Fragmentation makes your hard disk do extra work that can ultimately slow down your computer. To combat this, use Disk Defragmenter. This will rearrange fragmented data so your hard disk can work more efficiently. You can defragment your hard disk on a schedule or you can do it manually. Check out Ways to improve your computer's performance for additional instructions.

Reinstall Windows
Some laptop manufacturers have a recovery partition which allows you to restore your computer to factory settings. This will erase your data, updates, software, etc. So you need to do a backup before reinstalling Windows.

Do check your laptop's online documentation to access recovery partition.

If you do not have recovery partition, perform a clean install of Windows to make it run like new. However, if you are running on Windows 8, you can either perform a PC Refresh or a PC Reset. A PC Refresh will reinstall Windows but will keep all your data, while PC Reset will get rid of everything and will do a clean install. Make sure you back up your data to an external drive, shared network drive, or to cloud.

Thursday, April 17, 2014

Important Things You Need to Do on Your New Printer

Setting up a new printer shouldn't be a challenging task. Even though some setup procedure may vary between manufacturers, it should nevertheless be of the same logic and is generally straightforward. Printer setup and installation is considerably foolproof nowadays because almost every new printer comes with a cheat sheet, setup guide, and setup wizard to make your printer nearly a plug-and-play device. Before you roll up your sleeves and get started, here are some points you may want to take note of before and after setting up your new printer, as well as some tips on what to do to make sure your printer will go a long, long way.

PREREQUISITES

 1.     Buy extra ink cartridges
Most brand new printers come with a starter low-capacity ink cartridge set, which could quickly run out sooner or later. It is ideal to stock at least one set of spare cartridges, especially on cases where you need to print an urgent time-restrained document. Also, buy those that are of higher-capacity because they tend to last longer and are tested to be more cost effective in the long run.
 2.     Buy printer-friendly paper
Retailers sell cheaper, branded paper that you can safely use with your printer brand. You may want to consult your printer documentation to determine what type of paper will work best. You can get a multi-purpose type of paper for everyday use, unless of course you need to print a more special document such as invitations or posters. 
 3.     Buy cables if your network setup requires additional
Normally, printer manufacturers include the appropriate cable that will be used in order for the printer to operate with a computer. There are three common types of cable that are commonly used with printers: USB, Ethernet, and Fax. Most printers come with a USB cable (with a type B connector for plugging into the printer), while most multi-function printers with fax capabilities are supplied with a phone cable. If in case you purchased a network printer and are planning to set it up for wired connection, you need to purchase an Ethernet cable separately. Check first what cables are included in the printer box, plan how you will configure it, and then buy the needed cables before you start the setup.

SETUP

 4.     Take note of the printer's 3 "Numbers"
Whether you prefer to do it on your smartphone/gadget or on a piece of paper, it is a must to take note of the printer's serial number, model number, and the company's tech support number for reference. Not only will it make your support calls faster and easier, it will also avoid having to go through the printer's box or other documentation just to find out its serial or model number. You can usually find these information on the sticker label found at the back, if not at the bottom of the printer. 
 5.     Refer to the printer's Quick Startup Guide
If in any case you find yourself lost during the setup, never underestimate the power of documentation. Quick Startup Guides have now become more user-friendly as it even include illustrations on how each step is performed. Common procedures include unboxing the printer, installing the ink or toner cartridges, aligning the print head, installing the bundled software, setting up the Wi-Fi connection, and some other printer functions. In worst cases where everything still doesn't work, you can always call tech support to help you along the way.
 6.     Consider a custom software installation
Every software offers you an option whether you would like a standard or a custom-type of installation. Standard will install everything, which means it will also likely to install bloatware and unwanted applications that may take up a huge amount of your disk space and slow down your computer. So to avoid these garbage, you may want to try going with the custom installation so that you can get to choose the correct components and applications to be installed.
 7.     Analyze the bundled software before installing
Printers nowadays come with tons of add-on features like photo editing, photo album, OCR, document management, and many other programs. While some of these may be useful to our daily work, there are still chances that we are installing unnecessary bloatware. Take extra care and time to examine these bundled software before hitting that Install button.
 8.     Set Up the Wi-Fi and Fax Functions
This is a perfect example where the printer's Setup Wizard plays an important role. Ideally, setting up the fax and wireless connection of the printer is pretty simple. You may be required to set it up via wired connection before going completely wireless. You will need to supply your networks wireless information such as the network name and the wireless key (if you have a wireless security enabled) in order for the printer to establish a wireless connection. Same goes with setting up the fax side, which requires fewer steps, and is also straightforward when done with the help of the setup wizard.
 9.     Keep the Installation CD
Store the printer's installation CD in case you will need to install it on another computer or reinstall the printer on the same computer later on. Put it in a place where you can easily find it or much better, in a CD shelf for all your one-stop CD needs.
UPKEEPING

10.   Shake laser toner cartridges before installing
Settled toner produces poor print quality, so to avoid them from settling, give it a good shake about five or six times in back and forth motion. Likewise, if you start to notice faded printouts, take out the cartridge and shake them again.
11.   Take note of ink level warnings
Printers now have a feature wherein it gives an alert when the ink level reaches low and needs to be replaced. Some may even provide the user the actual percentage of a certain color ink or toner remaining. However, these warnings may inconsistently vary depending on the printer and manufacturer, with some giving out a warning just before a cartridge runs dry and some coming out way earlier. Observe how long it usually takes for the print quality to start degrading once you receive the said warning, and then proceed to replace the cartridges after that. Replacing the cartridges in advance is a waste of ink and money, but if you wait too long, it may ruin an important print job.
12.   Align the print head and clean the nozzles as required
If you experience poor quality printouts even though the ink level is still on the safe level, try aligning the print head and clean the nozzles of your printer. To do this, unseat then reseat the ink cartridges. On the maintenance menu of your printer's screen, select Align Print Head or any similar option, and then run it. Wait for your printer to print a test page. Next, select Clean Print Head or any similar option, and then run it. If you still got the same poor print quality, try cleaning the print head or nozzle several times.
13.   Keep your printer clean
It's best to use a soft cloth dampened with a cleaning solution or simply water to clean your printer. Just be careful not to touch the inner parts of the printer with water or cleaning solution as it could damage the printers sensitive parts. If you have a multi-function printer, gently swab any dust or small debris from the printer's platen.


You can also check out your printer's documentation for some other tips and steps on how to configure or take extra care of it. By simply following these guidelines, you can expect your printer to work perfectly in the years to come.